Setting up your email address using Windows Live Mail
Launch Windows Live Mail on your computer
If you are not presented with add new email account wizard
- Click Accounts
- Click Email
You'll be presented with the following window
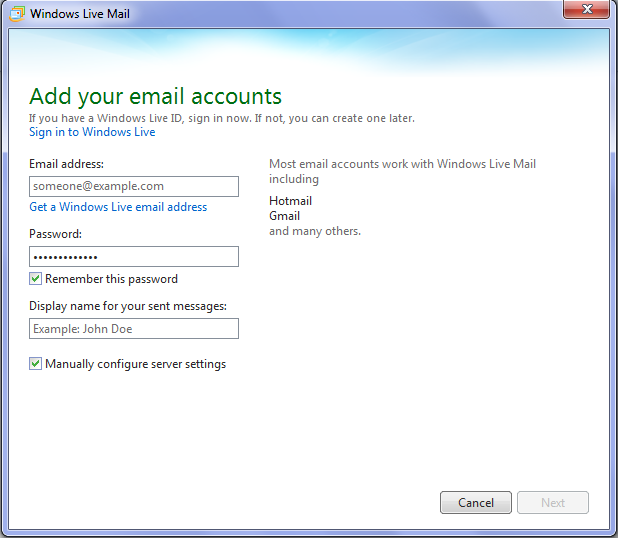
Click Next
On the following screen
Enter your email address
Enter your email account password
Tick Manually Configure Server Settings
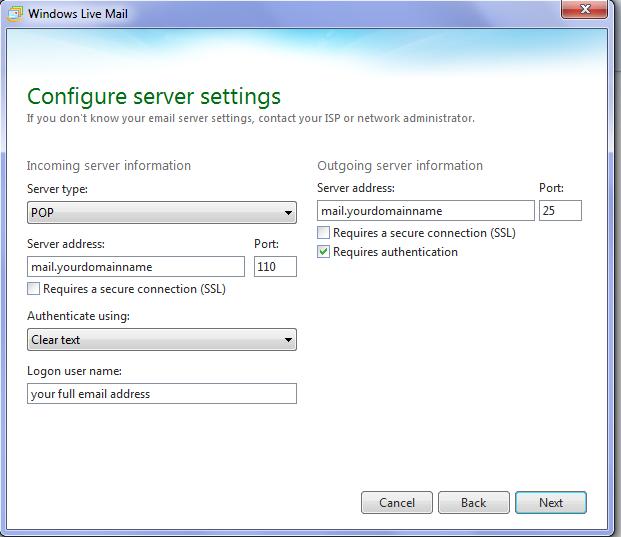
Incoming Server Settings (POP3)
- Server Type
Select POP - Server Address
e.g. mail.yourdomainname.com (this information is to the right of the @ sign in your email address) - PORT Number
110 - Leave Requires SSL unchecked
- Authenticate using Clear text
- Logon User Name
enter your full email address
Outgoing Server Settings (SMTP)
- Server address
mail.yourdomainname - Port number
25 or 26 - Leave requires SSl unchecked
- Tick Requires Authentication
- Click Next
If successful you'll be presented with the following screen
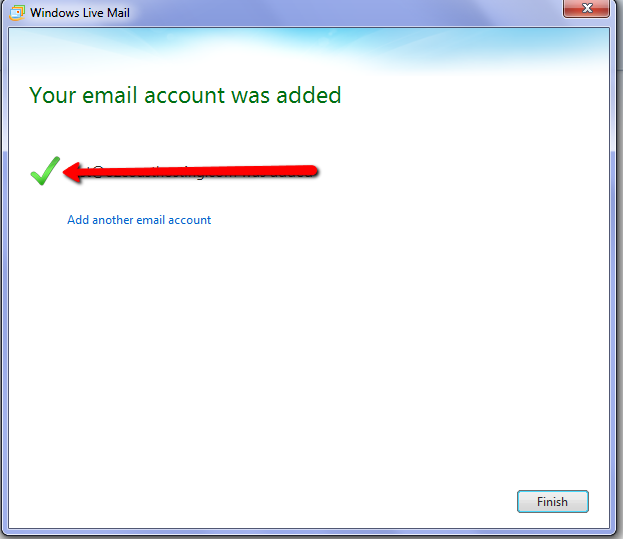
Click finish. There are still a couple of steps so read on.
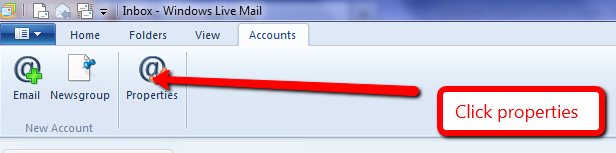
- Click the accounts Tab
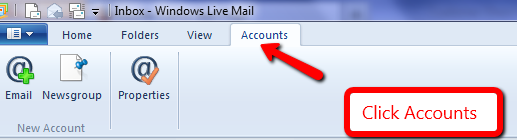
- Click Properties
- Click the Advanced Tab

- At the bottom of this tab
Untick leave a copy of messages on the server or
Tick remove copies of messages from the server after xx days. We suggest no more than 7 days to avoid your mailbox quota being reached.
- Click OK and you are done.
